Working with PDF Compress Expert
With the extremely simple and clear interface, you can quickly compress your original PDF document. Please follow steps to get it done.
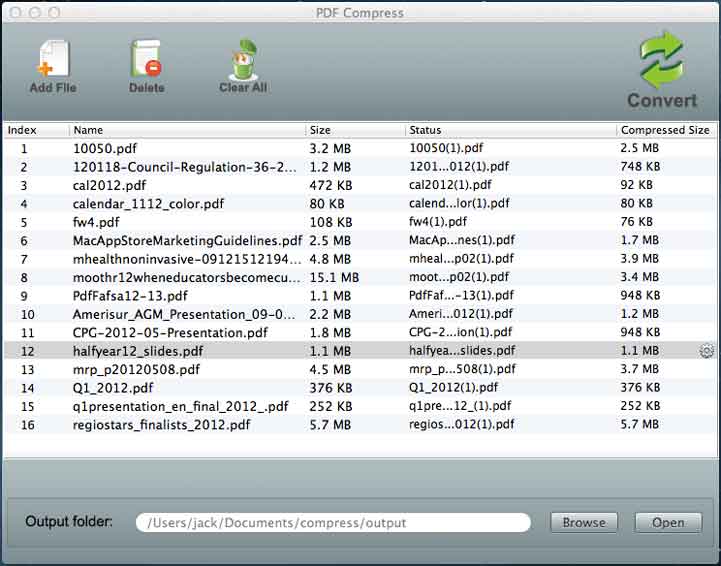
1. Add Files:
Click “Add files” button  to import the original files you want to compress, or click File-‐>Add Files on the menu to get started. You can import unlimited original files at one time. Click “Delete” to import the original files you want to compress, or click File-‐>Add Files on the menu to get started. You can import unlimited original files at one time. Click “Delete”  to remove one imported PDF file, click “Clear” to remove one imported PDF file, click “Clear”  to remove all PDF files. to remove all PDF files.
2. Set output options
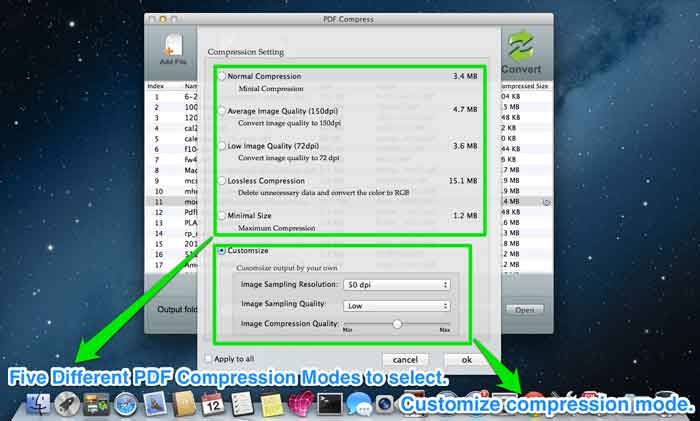
Click on the gear icon  in the line of the selected file. It provides 5 preset options to meet your different demands. You can choose from lossy image quality to minimal file size as you wish, moreover, you can also customize the output flexiblely. in the line of the selected file. It provides 5 preset options to meet your different demands. You can choose from lossy image quality to minimal file size as you wish, moreover, you can also customize the output flexiblely.
Choose one format and select Apply to all option, the format of current file setting will apply to all the files in the panel.
1. Normal Compression: Uses the compressing utility in the system to compress the size.
2. Average Image Quality (150dpi): Converts all image quality of all JPEGs in the PDF to 150 dpi.
3. Low Image Quality (72dpi): Converts all image quality of the JPEGs in the PDF to 72dpi.
4. Lossless Compression: Deletes all the unnecessary data in the PDF and converts the color to RGB.
5. Minimal Size: Uses the maximum power to compress imported DPFs, making sure the output files' to be as small as possible.
Customize mode: You can setting image sampling resolution and sampling quality and image compression quality as the like.
3. Compress
After setting the output settings, click Convert  button to compress original file. The compression will be finished in seconds. Then you can click on the link in the document list to open the compressed file or click on the File-‐>Open Output Folder to open the output folder. button to compress original file. The compression will be finished in seconds. Then you can click on the link in the document list to open the compressed file or click on the File-‐>Open Output Folder to open the output folder.
|